Tag Archives: schweiz

Preparing to Paint

After picking out our paint swatches, we headed back to Jumbo with a rental car to pick up our outdoor furniture and buy the painting supplies. I had prepared a list of supplies with the help of a colleague, but I was still a little unsure what type of roller I wanted and which types of paint brushes were available.

Because it was a weekday, we were in German-mode and Kay was also a bit hangry after work, so overall it was not the friendliest shopping experience as I tried to quickly figure out auf Deutsch what I wanted before our rental car was due back. Anyhoo, here are my spoils!

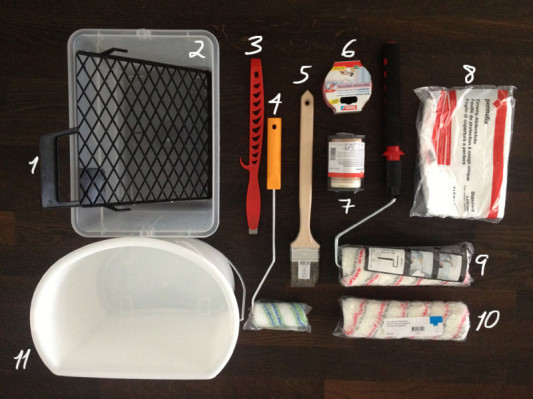
  1. Painting sieve: 2.25CHF ($2.44)
  2. Bucket: 8.95CHF ($9.70)
  3. Whisk: 2.5CHF ($2.71)
  4. Small roller: 5.95CHF ($6.45)
  5. “Angled” handle brush: 9.5CHF ($10.30)
  6. Pink painter’s tape: 3.95CHF ($4.28)
  7. Painter’s tape with brown paper: 2.95CHF ($3.20)
  8. Plastic covering: 5.75CHF ($6.24)
  9. Telescoping paint roller: 26.9 ($29.17)
  10. Extra roller: 13.50CHF ($14.64)
  11. Bucket: 8.25CHF ($8.95)

We had a *bit* of a debate about what kind of roller to buy and which kind of paint brush to buy. I was looking for an angled trim brush like Young House Love recommends (or many US resources), but I just couldn’t find anything similar. Kay just kept pointing to the “dispersion” brush section and saying that we had to choose a brush from there, but I wasn’t really happy with the selection. They didn’t have ANY angled brushes! 🙁 And Kay just kept saying that the brush had an angle in the handle, and that meant it was an angled brush. He was positive that this is what ALL painters use in Switzerland, so that’s what we bought.

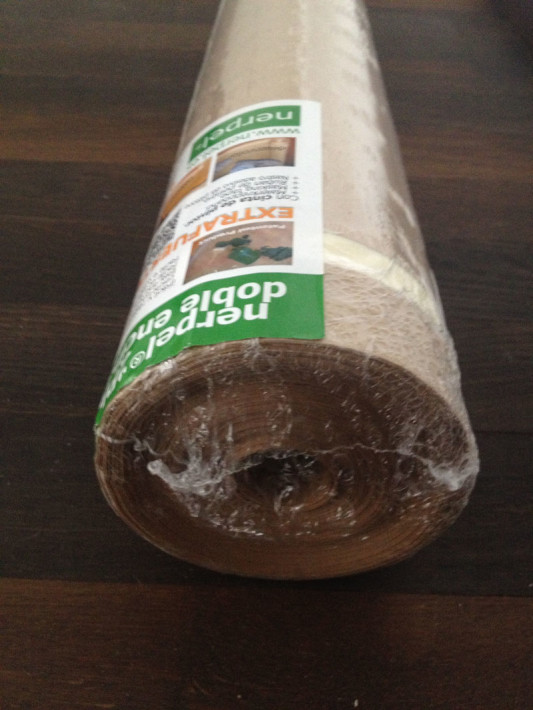
  • 1 Roll of brown floor paper: 19.95CHF ($21.63)

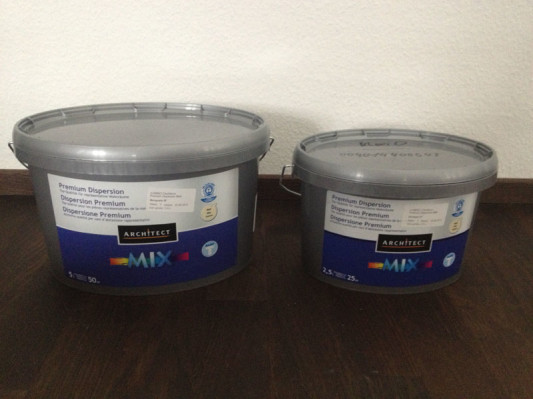
  • 5L purple paint: 48.5CHF ($52.6)
  • 1L green paint: 12.5CHF ($13.56)

Total Project cost: 180.9CHF ($196.98)

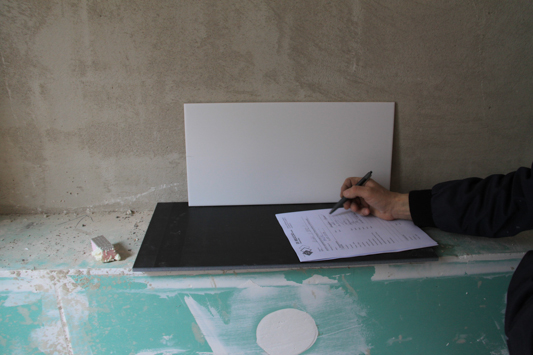
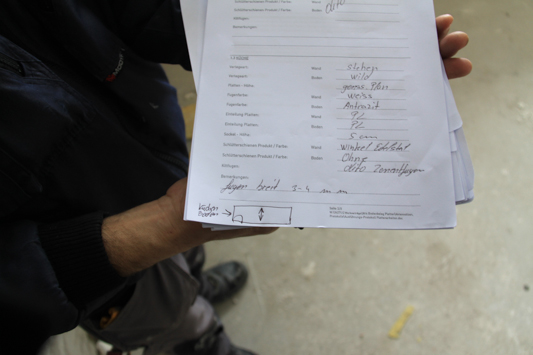
We ended up just going for it and buying the colors we liked. Our swatches were actual paint strips on paper and not just printed colors, so we were pretty confident that the actual paint would be what we wanted and I wasn’t going to be totally upset if it was slightly different because we had a clean slate at home to work with.

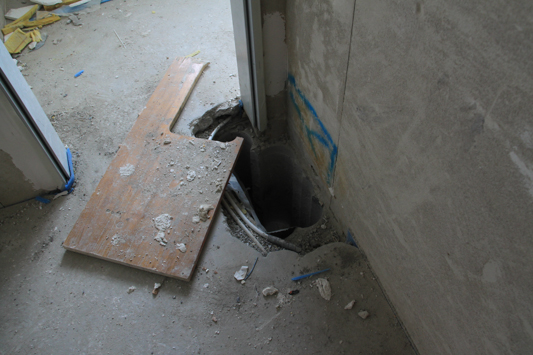
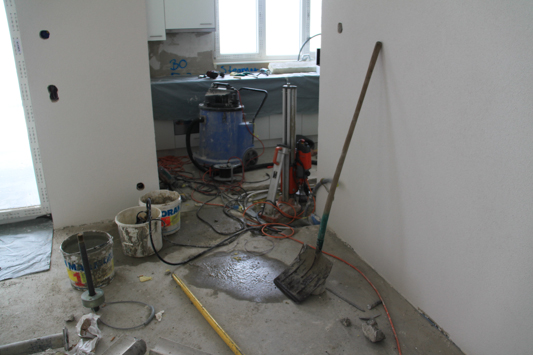
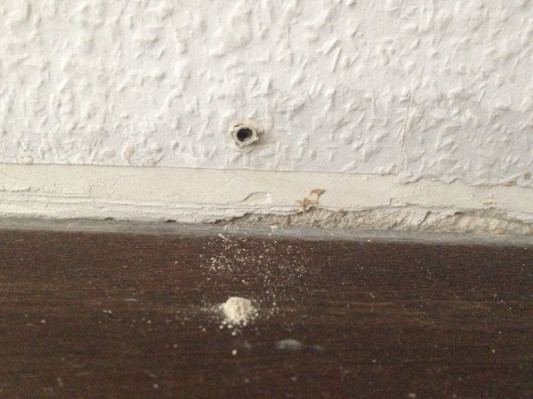
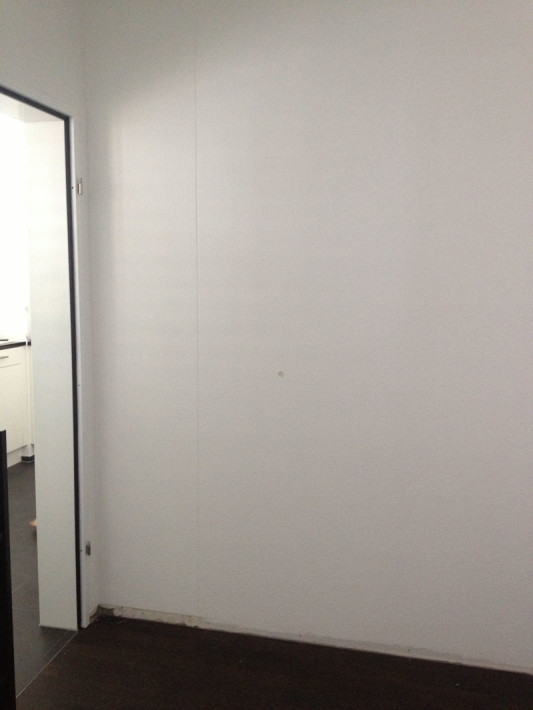
Back at home, Kay started preparing the entry wall for painting by unscrewing all the molding from the wall to paint below it. Our painters that Allreal hired were actually really lazy and didn’t tape or remove anything in the entire flat. They painted over the sides of all our doors, painted light switches and basically anything that was removable they just painted. It was nice to take the molding off and know that we’d do a better job painting it than the builders had done.

Can you see the two colors of white above the hole on the right? Yeah… nice work!

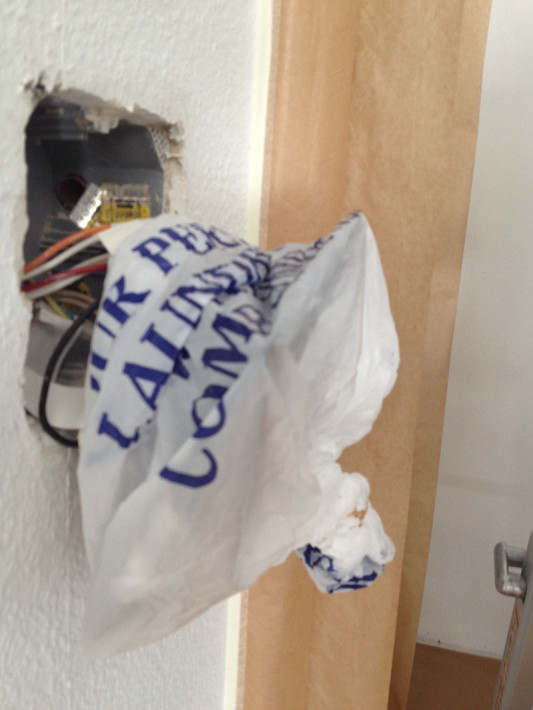
Next Kay removed the doorbell camera cover and the light switch cover.

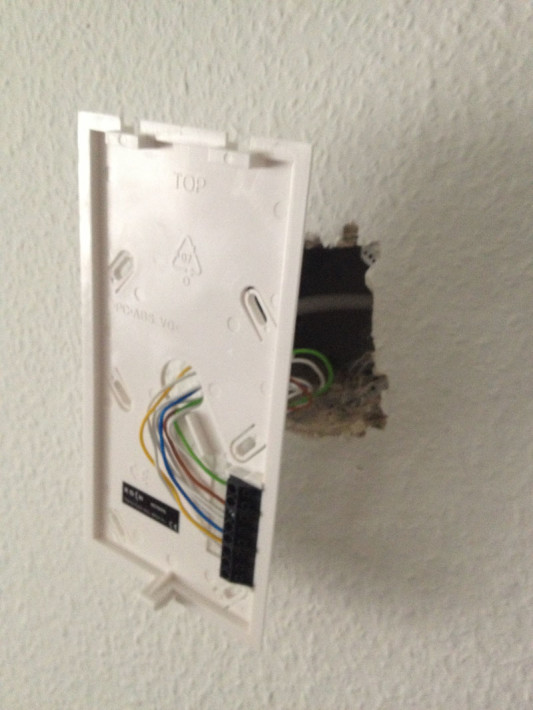
See, lazy painters?! This is how you do it properly!

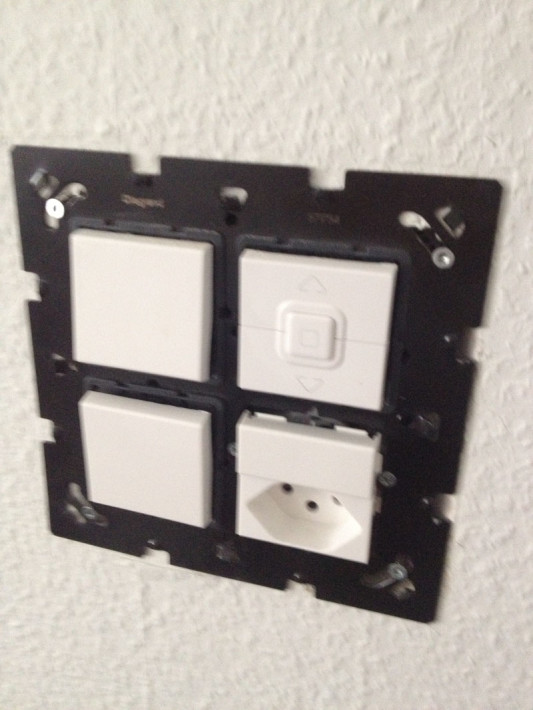
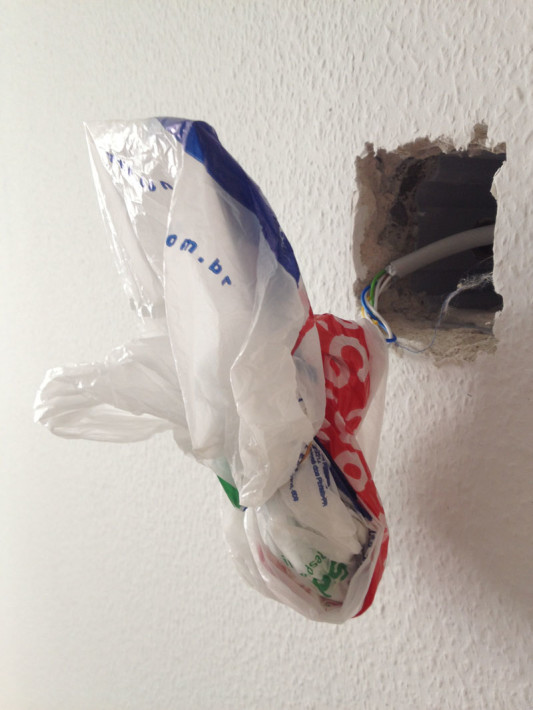
Both the light switch and doorbell hardware kind of hung out a bit from the wall, so Kay just bagged them with plastic and taped them up.

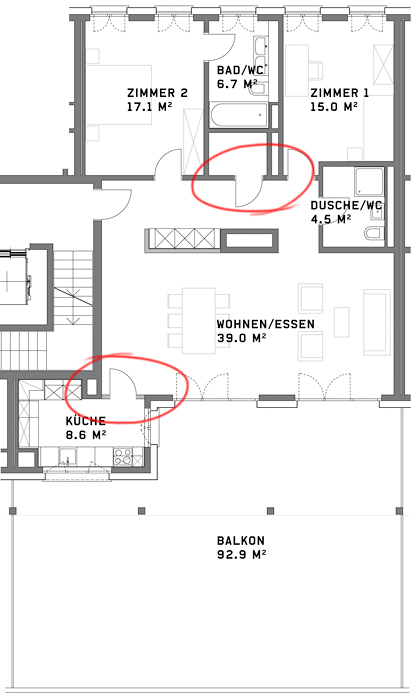
Kay also took the kitchen door off its hinges so that it wouldn’t be in the way as I went to and from the kitchen while painting.

Next I started taping. Kay was pretty adamant that I MUST tape. Period. We kind of had a heated discussion about it and I figured I would just shut up and tape and see how it goes and blame him if it goes wrong.

But when I started taping with the one-sided paper tape, which is tape with a 5″ or so piece of waxy paper attached to it, I noticed the tape was more like masking tape and when I went to realign some, it ripped a bit of the ceiling paint off. Nope, not putting that on the rest of the walls! So I stuck to the pink tape.

In the living room I put brown paper on the floor which I doubled up on later, and once the pink tape was up I put the brown paper tape on top of that. But I had a problem… I had already taped up all the kitchen walls when I realized that the pink tape was also taking off a bit of the ceiling paint in the living room.

Not good!

I told Kay that there was no way I was taping up the whole living room ceiling, which is much bigger than the kitchen area and he was really worried about the ceiling paint so he agreed that I should try and paint it by hand instead, but I was worried because the brush we bought for the trim seems kind of not-precise, so I was really not sure how it would do.

When all the taping was done, Kay was already wandering in and out asking me when I would start painting. The man was obviously nervous. 🙂

Tape is already a couple points down with this ripping-the-ceiling-paint-off business. I’m not optimistic, but Kay wouldn’t have me painting any other way. Do you ever follow your spouse’s wishes even though it’s against your better judgement?

Neubau Progress: Walls, Woodwork and Everything Else

Maybe I glossed over it in previous posts, but throughout the bathroom and kitchen upgrades, we were thinking about the overall look of the house the whole time.

The contractor gave us several cost neutral “free” choices and from there we could choose if we wanted to upgrade to a different material for our floors, kitchen cabinets, bathroom tiles, etc. It would be very easy to sink several thousand francs into upgrades, so we really tried to stick to materials included in our base price.

In fact, I was sure that from the granite to choose from below, we would go with Shiva Black because it was free and what we wanted (black), however, when we went to the kitchen store to view the granite in person, Shiva Black just looked… well, boring. We opted to upgrade to Nero Marcus (maybe not the version below) that had a much better texture and glints of texture that caught your eye in the sunlight.

For kitchen cabinets we really kept it simple because not only would it cost a lot to upgrade all of them, but Kay hates cleaning our current super shiny “glanz” cabinets because they show every fingerprint. So for this we stuck to basic, Swiss white.

In the bathrooms and kitchen we would have tile and since, again, we did not want to spend a few thousand upgrading to complete black, we opted for the proCasa 342a below, which is a darker grey in reality. We figured that in the kitchen especially, having dark countertops and floors would be balanced by the white cabinets.

When I first saw the parquet options I knew that Kay would want “Eiche” and I would want “Räuchereiche” or “smoked oak”. But I didn’t think Kay would ever agree to such a dark wood, so I thought maybe we could settle in the middle with Merbau. Sure enough… his first suggestion was the Eiche, or oak.

I was pretty set on Merbau until we actually saw it in real life. It was not nearly pretty as below. It was a cheap-looking wood with many dark spots and specs that I did not care for. Surprisingly, both of us agreed that our very favorite wood was the oiled smoked oak, which is available below in a fishbone pattern.

When we actually went to the flooring business they told us that for less money, we could have the oiled smoked oak without the fishbone, which Kay is not particularly a fan of. He thinks it is too old fashioned, so I agreed we should get normal grain wood.

The salesman explained the difference between laminated wood and oiled wood and we were pretty sold on the oiled wood. It’s more natural, easier to buff out scratches and you can re-oil and re-stain it over the years as it lightens. To be honest, all of the laminated cost-neutral options seemed kind of lame once we learned the benefits of oiled wood.

Above is our bathroom cabinets veneer with the wood. They’ll never be in the same room, but they are more or less in line with each other. The planks of wood will also be this width throughout the apartment.

Below is the plan showing where the wood flooring will be installed and where the tiles will be installed. At first when we received our plan, they left the wood out of the pantry in the middle, so it was important to check that they put it everywhere they should!

With the flooring salesman we also discussed which direction the wooden planks will travel in. We thought it would make more sense for them to travel down the length of the living room, longwise, but the guy explained that wood flooring looks much better when the light coming through the windows travels down the wooden plank, so we set up the wood to travel that direction in all the rooms.

Again, when Kay had the meeting with the tile guys he had them set up the direction of the tile in the same way as the wood flooring to match.

Our flooring choices are a bit dark, but with all the white on the walls and cabinets I think it will be a nice balance. Next we can decide if we really want to do a black/red/white theme like we did for our wedding or if we want to branch into other colors like teal, green, etc… Maybe some mood boards are in our future.

Lastly, when we decided everything for the bathroom we actually had to pick out a sink for the cellar washing area and decide if we wanted to spend a ridiculous amount on the drying system below. The answer is “no”. But we are “splurging” (or being swindled, based on how you view it) for the garage storage box because I think that will be important for anyone who has a car in our parking spot down the road.

So, that’s that. Besides worrying about my toilet paper holder, I think almost all of the flat decisions have been made at this point.

Want to catch up?

Neubau Progress: VII

I was really worried that after January, we wouldn’t be able to see our flat again until it finished in May, but in February, Kay visited the flat for an appointment with the tile guys in the bathroom.

He noticed that in addition to the big hole we found in the kitchen, they had also drilled further into the hole outside the kitchen door. Not impressed.

Kay met with the tile guys and told them which direction we wanted the tiles to go. We also decided that since they fit perfectly on the ledge, we would use the black floor tiles on the bathroom ledge above the sink as well.

Kay sent me pictures of how the tiles would be direction-wise and he explained to me that they would be setup subway style as opposed to straight grid lines.

Kay also asked me on the phone if I was really sure I wanted white grouting on the walls, because it would cost more. Yep. I want white, white, white so I can see any dirt or grout on my bathroom walls. I think we can spare the minimal cost of upgrading here.

We also specified that we wanted the darkest grout available for the floor to match the floor tiles. My mother always had a hard time keeping the light grout in her kitchen tiles clean so I definitely didn’t want that to be an issue for us.

The rest of the flat was still kind of a crazy mess. Since they drilled the utility shaft so late, everything was a bit behind in the kitchen installation. We were also exchanging our steamer to upgrade some more, at a special, extra additional cost on us… but whatever. I was going to get my temperature controls!

Kay also snapped a photo of our curtain rails.

Small details like this are something that the company sort of glossed over, but I would wake up in the middle of the night and wonder if we have to pay to install something ourselves or if it comes standard with the flat. I was happy to see them installed.

As you can see, they are the standard double curtain rail in Switzerland. We don’t normally have fancy curtain rods, but instead these minimalistic flush curtain rails with a track for sheer privacy curtains and another for heavier blackout curtains.

Our fuse box was still a hot mess.

Here they’d already marked on the floor which direction the tiles would be laid.

And since he was there, Kay went down to the floor below ours and checked our our kitchen hole from below.

Argh, just what are they doing in the kitchen?

I think this is the flat below ours where you can see they unfortunately had already installed the kitchen cabinets when they realized they’d forgotten the utility shaft.

Well well, no point stressing when there’s nothing we can do. We just had to wait and hope they patch it all up correctly… At least our tiles will be the right color and grouting after asking three times and going to this appointment!

Want to catch up?

Rock Climbing in Switzerland

On Saturday we got a call that we were bumped from the wait list and we could join an introductory rock climbing course offered by Bergsport Bordogna at a natural (outdoor) climbing wall near Solothurn, Switzerland.

Kay has been asking about a climbing course for ages, so I agreed to go and see if climbing was something for me or not. We got up at 6am on Sunday and headed on a train towards Solothurn. At 8am we arrived at Bergsport Bordogna where we met our climbing group to get fitted for harnesses and shoes.

This is when I realized the entire course would be in Schwiizerdütsch. Ahh.

This is the “easy” flatter wall where we learned how to climb in our rubbery shoes, how to tie figure eight knots and clove hitches, and how to belay partners with a top rope setup. Our instructor looked kind of like an old grizzled Daniel Craig with hairier arms and blonder hair, but obviously someone you would trust with your life.

I was feeling pretty good with our progress on the easy wall. Around 12pm we had lunch and then Herr Craig informed us we’d be doing a “real” climb on the much taller, much steeper, much scarier wall around the corner. I admit, I was a little nervous when we passed the bend and I looked up and saw people climbing very far up from us… Gulp.

I chose to start the climb so that in theory I would do less climbing all at once, but if you think about it… both Kay and I would have to climb the whole wall. (Well, duh!) I climbed up and secured myself into a standing point and then belayed Kay up. Kay climbed past me to the next station. I apologize if this sounds weird in English, but since it was all in Swiss German I wasn’t really told what the English terms are for climbing. When we make it to a station we were told to yell “Stand!” (shtand!) and then yell things like “Seile ab!” or “Bin versichert!”

I had no trouble getting up to Kay, but when we did our next routine upwards, it was again my turn to climb and that’s where I started getting nervous. The rock smoothed out quite a bit and there wasn’t much to hold on to with your hands or grip with your feet. In essence, I felt like I was climbing on a flat wall straight up, even if we had a pretty low grade angle. (Maybe a 3 on a scale of 10… I obviously don’t know much about rock climbing and I didn’t have the info for the area we were climbing in…)

Anyway, I kept going and I was getting more and more nervous, with my anxiety feeding on itself. I slipped a little on my way up to Kay and fell off the wall for a moment, grabbing on to the rope that Kay was belaying. I gained my footing again and tried to shake off the jitters, but I looked up and Kay was facing another climber and chatting at the belay station. Urp. (He did realize I slipped and held the rope tighter… so he was paying attention!)

I made it to Kay with a bit of ledge to stand on… but I had to keep going on upward. I didn’t even realize I climbed past the next belay point until Herr Craig yelled at me. I was too busy concentrating on getting to the top! But that made it even worse, I had to climb down the smooth, terrifying rock.

Herr Craig climbed up to me (with no safety rope or anything… he was like a monkey or an ibex) and gave me some tips which helped. Kay reached me and climbed on, we did our ladder routine once more and  before I knew it I had reached the top. Kay had no idea how freaked out I got during the climb, and part of me felt like “Great, I climbed all the way up here… now how the hell am I going to get down?” If it were climbing… I think I’d be stuck up there still.

Thankfully the instructors arranged some abseiling so we could all descend relatively quickly in a few trips to different points down the rock.

My fingers were pretty sore and kind of swollen the next day, but I felt tired in a nice way on Sunday evening. Kay and I both slept really well that night. If Kay is around, we may even try course number 2, if I can stand it. I’m still not sure climbing is for me, but I’m willing to give it a try.

Nothing says you trust your spouse like letting them belay so you don’t fall to your death descending. Trust in Kay, trust in Kay.

Have you ever gone rock climbing or would you ever consider trying it out?

Neubau Progress: Changing Doors

While our Rohbau phase of building was done, or as our contract manager liked to think… SET IN STONE… we did want to make some intelligent tweaks regarding doors…

Remember what our floor plan looks like?

If you notice up there, in the “Reduit”, the door opens into the pantry closet. Now, I think you all agree that it doesn’t make sense to open a closet door into the closet and lose all that extremely valuable storage space. We had to change that.

But worse was in the kitchen. Because the kitchen was almost closed off without a door, we decided to keep the door option so that we would be able to totally shut off the sights and smells from dinner guests and sleeping spouses. But as the company had it planned, the kitchen door would open and partially block the windows if you left it open, which we plan to.

Well, that didn’t make any sense… so we put in our door requests and below you can see the slightly amended “new plan”.

Now we won’t have to worry about getting into the pantry and our kitchen door will spend most of its life sitting flush against the entry wall in the apartment. We just had to make sure they actually put our door frames in the correct direction!

Want to catch up?