Tag Archives: trim

Katie has problems painting

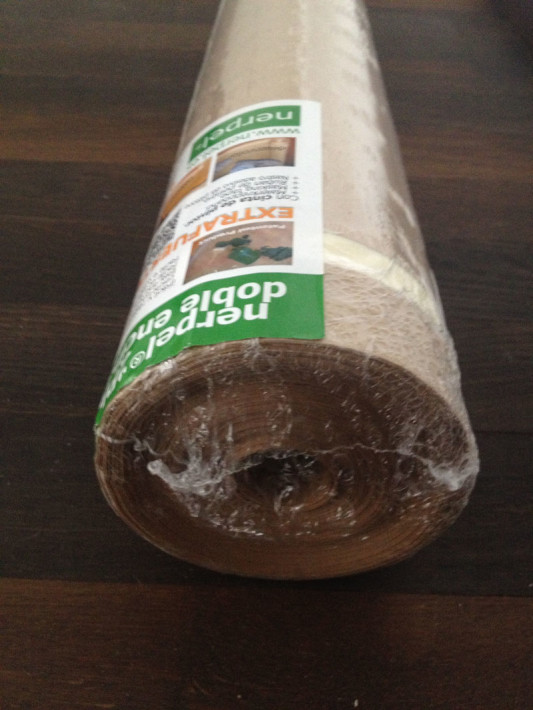
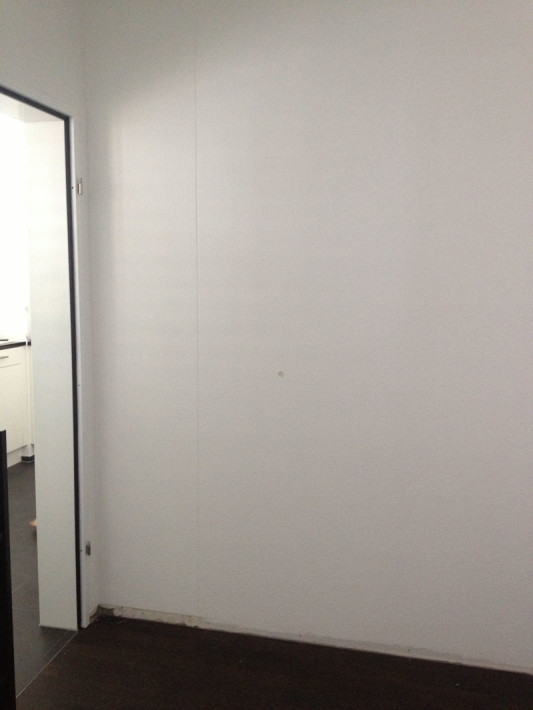
I was curious to see how the taping would turn out. I had told Kay what my suspicions were (leaking and peeling paint off) but I lost the battle. He wanted it taped, so I was going to paint our lines over tape.

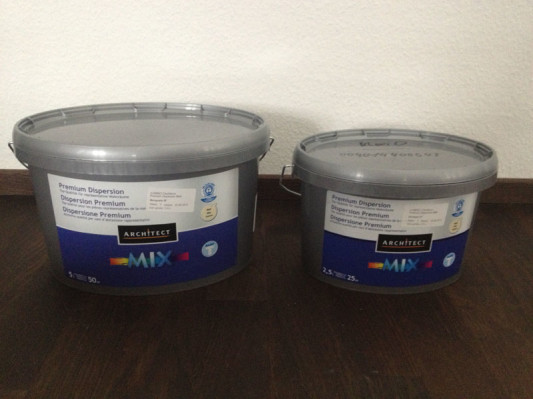
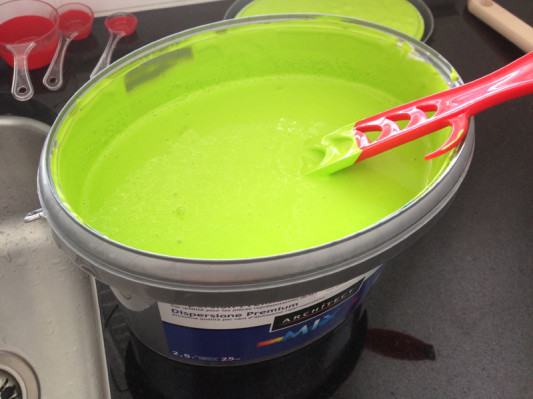
I mixed the water in the paint, stirred and then got busy for the next twelve hours on Sunday.

Kay wanted me to cover EVERYTHING so we even had plastic covers drapping down over all the cabinets. I thought it was totally overkill because I never got a drop of paint on anything besides the tops of the cupboards and we couldn’t open the refrigerator the whole day.

Why did it take twelve hours to paint though? Well… the first part was a little slow because I had a lot of edges to do and it was up high. But really, it was the big wall that took forever.

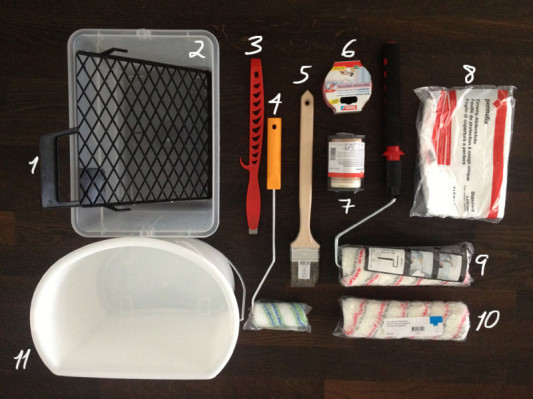
See, the extending roller we bought sucked. Big time.

The roller itself wasn’t terribly long and the extension part broke pretty fast… so it would collapse on my hand and pinch my fingers all the time. I was stuck using it half-way up from then on, while watching my fingers for more pinching. I had to paint the whole 9’2″ ceiling in portions from the top with the ladder, the middle and then the bottom instead of having a nice long roller to do it ALL in one go. I was so pissed we didn’t buy a nice long normal roller.

Our edging brush was as terrible as I thought it would be. It was just big and so imprecise, it made me feel like a two year old painting when I used it. Our saving grace was the small roller I bought at the last minute (at Kay’s request) because it was the only decent roller I had… I painted the entire ceiling line using a very small angled art brush I had laying around and using the roller to do most of the top half of the wall and the bottom half of the wall.

Using a 4″ wide small roller to paint most of your huge wall is kind of sad and pathetic, but I had to make things work.

I also had tons of issues with paint dispersion. The problem with the buckets was that I could not roll paint off with the plastic sieve on the side. The fluffy rollers picked up SO much paint and if I dunked the whole roller it was completely too much. If I only dunked half or so, I couldn’t evenly distribute it with the roller sieve, so I was either stuck trying to use an overly full brush on the wall (and risk having drops splatter back at me) or painting with a patchy, unevenly distributed roller.

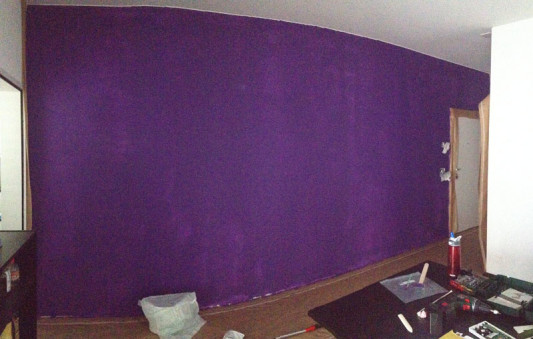
All in all, painting with this awful equipment was a terrible, exhausting experience. By 8pm I was done with the first coat of the purple wall and 2 coats of the green wall, so we took the plastic wrap down in the kitchen and had dinner before I finished the purple wall painting, but that’s when we took off the first tape and saw the damage:

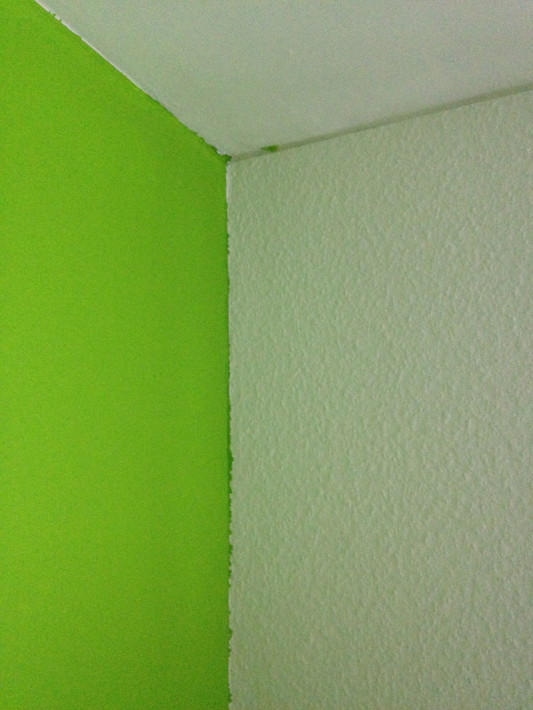
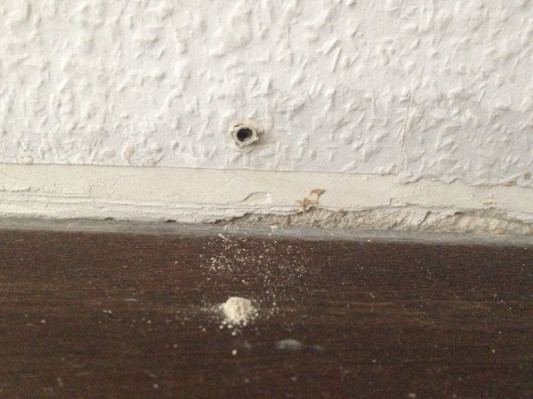
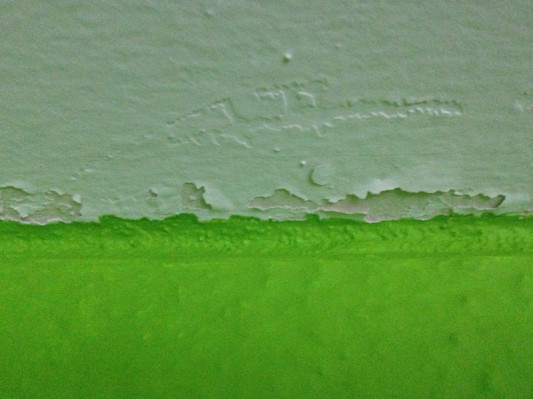
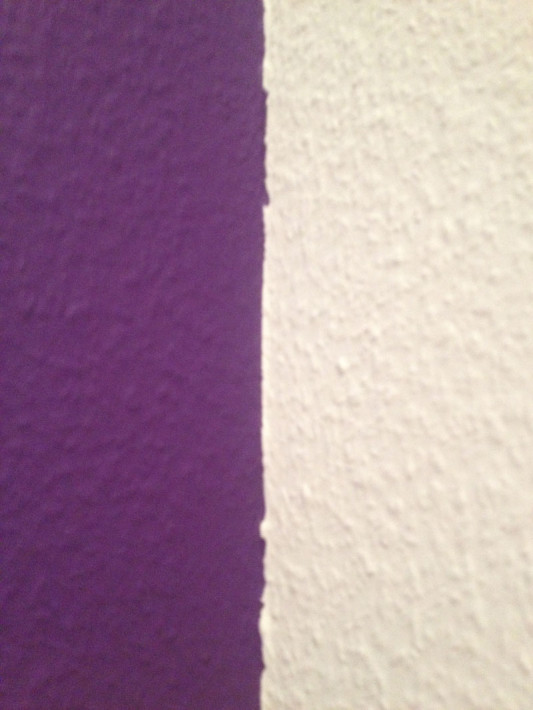
Everywhere I had taped in the kitchen had bled through, even on the corner up there. All came through the tape, JUST like I thought it would.

Since I had taped the kitchen ceiling with the pink tape before finding out it peeled off the ceiling paint, I also ripped off a lot of ceiling while I was carefully taking down the tape.

I was SO disappointed and pissed.

Kay was of course also upset that we took the ceiling off with the tape and that the edges turned out so badly.

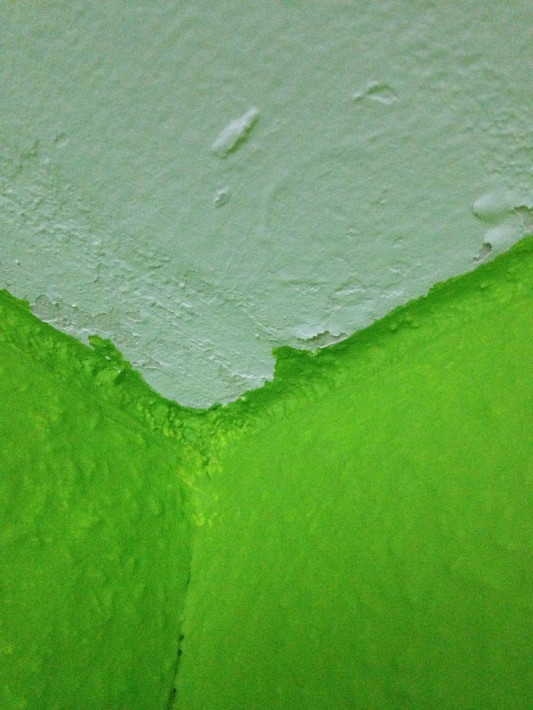
Look how terrible it looks! It’s awful!

With this in mind, I finished painting the purple wall until midnight and then carefully took off the tape again to see the same wavy lines.

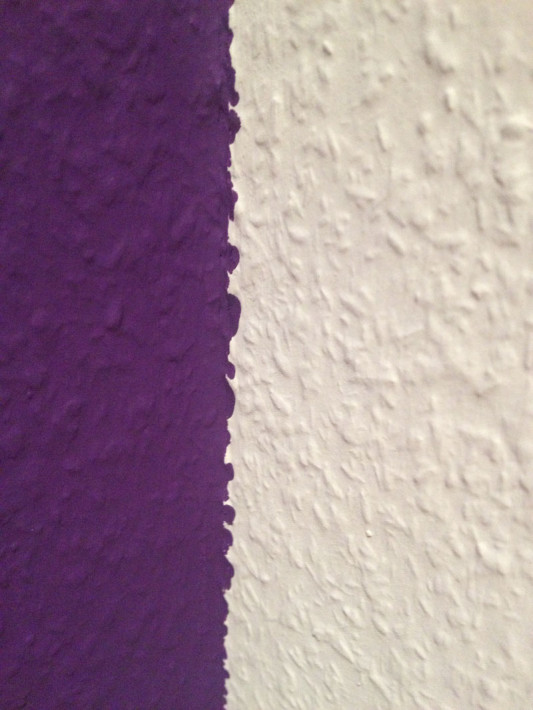
Ugh!! In retrospect, I should have argued that our textured walls made for a bad taping situation, but Kay was seriously so dead set on them.

In the end, our ONLY good line was the ceiling in the living room that I painted by hand with the art brush. It looked totally perfect compared to all the shitty taping lines.

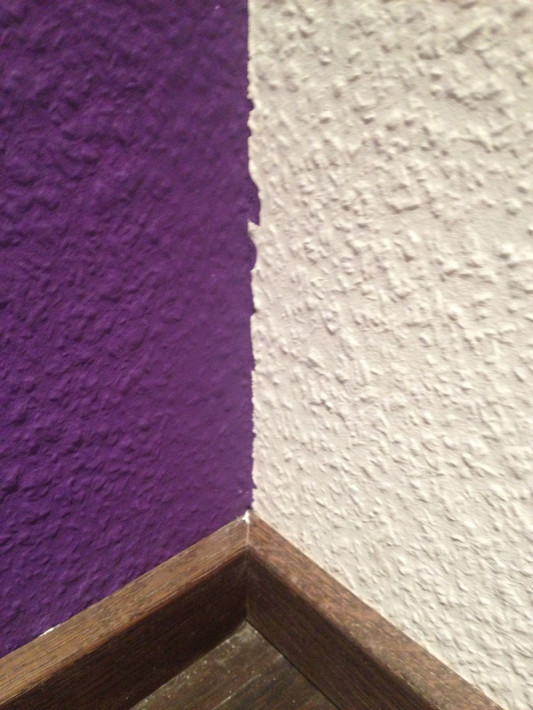
Kay finally admitted that my freehand painting is excellent and that we probably shouldn’t have used tape. Or if we did, we should have painted white down first, but we didn’t have any white paint from our walls.

Despite the annoying flaws at the edges, I do really love the colors. And Kay is contacting our contractor to see if the painting guys can give us some of the white they used on their walls so that we (I) can fix the edges… everywhere. Baaaah.

Did you ever have a project that you knew would go wrong from the start?

Preparing to Paint

After picking out our paint swatches, we headed back to Jumbo with a rental car to pick up our outdoor furniture and buy the painting supplies. I had prepared a list of supplies with the help of a colleague, but I was still a little unsure what type of roller I wanted and which types of paint brushes were available.

Because it was a weekday, we were in German-mode and Kay was also a bit hangry after work, so overall it was not the friendliest shopping experience as I tried to quickly figure out auf Deutsch what I wanted before our rental car was due back. Anyhoo, here are my spoils!

  1. Painting sieve: 2.25CHF ($2.44)
  2. Bucket: 8.95CHF ($9.70)
  3. Whisk: 2.5CHF ($2.71)
  4. Small roller: 5.95CHF ($6.45)
  5. “Angled” handle brush: 9.5CHF ($10.30)
  6. Pink painter’s tape: 3.95CHF ($4.28)
  7. Painter’s tape with brown paper: 2.95CHF ($3.20)
  8. Plastic covering: 5.75CHF ($6.24)
  9. Telescoping paint roller: 26.9 ($29.17)
  10. Extra roller: 13.50CHF ($14.64)
  11. Bucket: 8.25CHF ($8.95)

We had a *bit* of a debate about what kind of roller to buy and which kind of paint brush to buy. I was looking for an angled trim brush like Young House Love recommends (or many US resources), but I just couldn’t find anything similar. Kay just kept pointing to the “dispersion” brush section and saying that we had to choose a brush from there, but I wasn’t really happy with the selection. They didn’t have ANY angled brushes! 🙁 And Kay just kept saying that the brush had an angle in the handle, and that meant it was an angled brush. He was positive that this is what ALL painters use in Switzerland, so that’s what we bought.

  • 1 Roll of brown floor paper: 19.95CHF ($21.63)

  • 5L purple paint: 48.5CHF ($52.6)
  • 1L green paint: 12.5CHF ($13.56)

Total Project cost: 180.9CHF ($196.98)

We ended up just going for it and buying the colors we liked. Our swatches were actual paint strips on paper and not just printed colors, so we were pretty confident that the actual paint would be what we wanted and I wasn’t going to be totally upset if it was slightly different because we had a clean slate at home to work with.

Back at home, Kay started preparing the entry wall for painting by unscrewing all the molding from the wall to paint below it. Our painters that Allreal hired were actually really lazy and didn’t tape or remove anything in the entire flat. They painted over the sides of all our doors, painted light switches and basically anything that was removable they just painted. It was nice to take the molding off and know that we’d do a better job painting it than the builders had done.

Can you see the two colors of white above the hole on the right? Yeah… nice work!

Next Kay removed the doorbell camera cover and the light switch cover.

See, lazy painters?! This is how you do it properly!

Both the light switch and doorbell hardware kind of hung out a bit from the wall, so Kay just bagged them with plastic and taped them up.

Kay also took the kitchen door off its hinges so that it wouldn’t be in the way as I went to and from the kitchen while painting.

Next I started taping. Kay was pretty adamant that I MUST tape. Period. We kind of had a heated discussion about it and I figured I would just shut up and tape and see how it goes and blame him if it goes wrong.

But when I started taping with the one-sided paper tape, which is tape with a 5″ or so piece of waxy paper attached to it, I noticed the tape was more like masking tape and when I went to realign some, it ripped a bit of the ceiling paint off. Nope, not putting that on the rest of the walls! So I stuck to the pink tape.

In the living room I put brown paper on the floor which I doubled up on later, and once the pink tape was up I put the brown paper tape on top of that. But I had a problem… I had already taped up all the kitchen walls when I realized that the pink tape was also taking off a bit of the ceiling paint in the living room.

Not good!

I told Kay that there was no way I was taping up the whole living room ceiling, which is much bigger than the kitchen area and he was really worried about the ceiling paint so he agreed that I should try and paint it by hand instead, but I was worried because the brush we bought for the trim seems kind of not-precise, so I was really not sure how it would do.

When all the taping was done, Kay was already wandering in and out asking me when I would start painting. The man was obviously nervous. 🙂

Tape is already a couple points down with this ripping-the-ceiling-paint-off business. I’m not optimistic, but Kay wouldn’t have me painting any other way. Do you ever follow your spouse’s wishes even though it’s against your better judgement?